Saturday, November 14, 2009
Other techniques (Harp Harmonic)
A final technique (known as the harp harmonic) is a sort of combination between the natural and tapped harmonic techniques. Fret the note normally, and place the picking hand index finger on a natural harmonic relative to the fretted note (just as in tapped harmonics). Pluck the string with another finger and release the index finger, just as if producing a natural harmonic.
Tapped harmonics
This technique, like tapping itself, was popularized by Eddie van Halen. Tapped harmonics are an extension of the tapping technique. The note is fretted as usual, but instead of striking the string, the string is tapped at one of the frets listed in the natural harmonic list. Do not hold the string down with the tapping hand, just bounce the finger lightly on and off the fret. This technique can be extended by fretting a note, then tapping relative to the fretted note. For instance, hold the third fret, and tap the fifteenth fret, for the twelfth fret harmonic, because 12+3=15.
Pinch harmonics
A.K.A. Artificial Harmonics (though there is really nothing artificial about them). This is an advanced technique and was popularized by Billy Gibbons and many others as early as the 1970s including many Heavy Metal artists. These harmonics follow the same principles of physics as a natural harmonic, the difference being how the harmonic is produced. In this case a note is struck in a downwards motion with the pick and in the same motion the string is touched (one might really say brushed) with the edge of the thumb that is holding the pick. Or one can do it with the edge of the index fingernail, followed by the pick.
Pinch harmonics are most effective and audible using an electric guitar with overdrive or distortion and in some cases these harmonics are virtually inaudible using a clean (not distorted or overdriven) electric guitar or an acoustic. It can sound good when used properly even without much overdrive but it's not always clear or detectible. Use overdrive or distortion for best results especially while learning and practicing this technique.
With regards to difficulty: this technique, although rewarding, is mostly rewarding only in advanced situations (soloing and intense expressive riffing). It is difficult enough to easily frustrate a beginner and some intermediate players and since there are so many more rewarding and useful techniques worth spending time on as a beginner (scales, soloing, blues, riffing, strumming patterns), this technique is only recommended for intermediate or advanced players.
As mentioned above, these harmonics are produced by striking a note with the pick and touching the string with the picking thumb. Grip the pick so that the tip barely peeks out between your fingertips (this is why they are called "pinch" harmonics). It's easier when you are fretting a note with the left hand so try fretting a note (perhaps the 5th fret on the 4th(D) string), and plucking the string just below the neck pickup pole pieces (maybe 1/8" toward the bridge from the pole pieces). With luck the artificial harmonic will ring, but if not don't despair.
The position of the plucking along the length of the string is one of the most important parts of this technique. While with regular picking the position of the picking along the string can make slight variations in the sound of the note, when executing pinch harmonics the right position is vital and tiny positional differences can make entirely different harmonics. So try adjusting the picking hand just millimeters up and down the string around the area of the pickups.
Try imagining the pick and your picking thumb plucking the string at the same time although the thumb is really just brushing past it. Consider it to be really one motion. Try thinking of your thumb and the pick as one entity and instead of picking straight down, pick down and a little bit (millimeters) out away from the face of the guitar so your picking motion is a sort of 'letter J' out from the face of the guitar and so the thumb brushes past the string and remember that the thumb should only touch the string for an instant just like the pick does.
This technique requires practice. Try executing pinch harmonics while fretting different notes and by striking the string in slightly different places all around the pickup area of the guitar. Many kinds of harmonic ringing sounds may be produced.
Without a pick, this technique may be simulated by plucking the string with the fingertip and lightly touching it with the fingernail, but this is even trickier and not very useful in practice.
These harmonics, as opposed to natural harmonics, end up being much more practical to use while playing and when mastered can be used boldly like Zakk Wylde making the harmonic part of the riff, or subtly and possibly unintentionally to add color and character to the notes or chords while playing almost anything.
Pinch harmonics can easily and effectively be combined with other techniques, such as bending or vibrato.
Natural harmonics
Natural harmonics are the easiest to produce. A good place to begin is the 12th fret of the first string. With your fretting hand, lightly touch the finger against the string directly above the 12th fret. Do not hold it down, just touch it. Then strike it with your picking hand, and immediately release the string with your fretting hand. If executed properly, the result should be a high-pitched, ringing E (on a standard tuned guitar). It will be the same note as pressing against the fret will produce. Try it again at the 7th, 5th, and 4th frets, as in the list of natural harmonics: each will produce even higher sounds, much higher than can be produced on the guitar without using harmonics! However, each will also be quieter, so the higher harmonics may be nearly inaudible without overdrive.
Guitar/Harmonics
Harmonics are fun sounds to produce. They can be quiet and bell-like, as on an acoustic guitar, or they can be loud and squealy, as on an overdriven electric guitar.
Friday, November 13, 2009
Vibrato
Players of many instruments, including the human voice, use vibrato to help add expression to sustained notes. Vibrato is performed in two major ways, the first by rapidly bending the string back and forth, causing a modulation in pitch;
therefore, all of the information above about bending applies here, except it is performed faster or more prolonged. Or it can be performed in a 'classical' style where one applies pressure parallel to the string towards the neck then towards
the bridge repeatedly, which allows one to achieve vibrato upward and downward in pitch, albeit with a smaller change. A small, subtle vibrato might not require the assistance of other fingers; the fretting finger should be sufficient.
However, for sustained vibrato or vibrato on the first or second frets, using multiple fingers for bending is a good idea.
Bend and Release
The ideas of bending and pre-bending can be combined for a "bend and release", that is, striking a note, bending it up, then releasing it as you would with a pre-bend. This will often be perceived as a "bounce" in pitch, especially if played
quickly. The reverse is also possible: pre-bend, release, and bend. Repeatedly and steadily bending and releasing is called vibrato.
quickly. The reverse is also possible: pre-bend, release, and bend. Repeatedly and steadily bending and releasing is called vibrato.
Pre-bending
Bending, whether by pushing or pulling the string, raises the tension in the vibrating portion of the string, and thus always raises the pitch of the note. This means it is easier to slide up rather than down in pitch. To create the impression of
bending down, the guitarist uses a technique called pre-bending, that is, bending before the string is struck, then releasing the bend (either gradually or quickly, depending on the intended effect).
bending down, the guitarist uses a technique called pre-bending, that is, bending before the string is struck, then releasing the bend (either gradually or quickly, depending on the intended effect).
Bending
Bending is exactly as it sounds: bending the string to the side by pushing it (towards the sixth string) or pulling it (towards the first string), often while a fretted note is ringing. The first three strings are normally pushed, and the others are
normally pulled. This is particularly important on the first and sixth strings, as you do not want the string to fall off the fretboard. Whether the string is pushed or pulled, the note will be raised in pitch.
Many aspiring guitarists cannot bend properly. The sound of a bend is more important than how it is actually executed or how it looks, but a bad bending technique usually leads to a bad sound. Your favorite guitarist might bend using just
his or her fingertips and you might be inclined to copy this — don't! Your hands can sound every bit as good as your hero's without copying his or her technique. There are two keys to bending properly: proper thumb positioning, and
bending with the proper muscles. Do not keep your thumb behind the neck, where it usually is, but bring it up perpendicular to the neck (a position that is normally incorrect, but not in the case of bending). Keep the fingers firm. Do not bend
your fingers, but push or pull with your forearm. You will hardly see your forearm move, possibly just see a couple of muscles flex. It will feel awkward at first, but if you can bend with the thumb in the proper position and without bending
the fingers, you are probably doing it correctly.
Many guitarists will have trouble bending more than 1/4 step (half a semitone) or perhaps 1/2 step (one semitone) with only one finger, especially on frets close to the nut and on the thinner strings. It is much easier to bend with more than
one finger, for instance, with the index finger on the first or second fret and the ring finger on the third, and pushing or pulling with both fingers in order to bend at the third fret. More fingers may be used if this is not enough. It should be
possible to bend at least a full step (the pitch difference of two frets) this way.
Bending and vibrato
Bending and vibrato are two related effects which help give extra "life" to notes, especially sustained notes, by changing their pitch. The techniques are not commonly used on the acoustic guitar or general rhythm playing. However, they
are extremely important to many styles involving distorted guitar, e.g., rock or metal, even when playing rhythm (though, in that case, bends and vibratos are usually embellishments). Bending or an equivalent effect is not possible on all
instruments; the piano, for example, cannot have notes that change in pitch. This is one reason why it is important to know how to bend: because you can!
This section deals with bending and vibrato using your fingers, not the different technique of using the vibrato bar. The two techniques do the same basic thing, but using the vibrato bar as a substitute for fretting-hand bending is not good
practice; it is best used for very heavy bends or heavy vibratos, not slight embellishments like finger bending. It is more difficult to be subtle with a vibrato bar, and it is usually a bit out of the way for the picking hand to reach, making it
harder to use. In short, while in some cases which style of bending or vibrato is used is a matter of taste, the two techniques are not interchangeable and are used for different effects.
Thursday, November 12, 2009
The trill
A trill is two alternating notes, such as an A and A#. Only the first note is struck; the rest are rapidly hammered-on and pulled off
The pull-off
The pull-off is the opposite of the hammer-on. Again, using the E string, hold it at the third fret. Strike the string and while the note is still ringing, release the fretting finger. If done properly, the G should be followed by an open E. If the note doesn't ring out properly, try hitting the G harder and releasing faster.
Like the hammer-on, the second note tends to be less loud than the first. To help alleviate this, a slight sideways motion of the fretting finger while pulling off will add extra vibration to the string, and give you some extra volume. Often it is hard for a beginner to accomplish, and the sideways movement helps greatly.
A pull-off looks like this:
D---7p5--5p4--4p2--2p0--
Pull-offs, and Trills
Hammer-ons can be done anywhere on the fretboard, but for the beginner it is easiest using an open string. To quickly learn, strike an open E on the first string. While the note is still ringing, quickly and firmly press a finger on the third fret. If done properly, a G note should be sounding.
Quickly pressing your finger down and raising the note without hitting the string again is called "hammering on". Without electric amplification, the hammer-on tends to be quieter than regularly struck notes, especially if you haven't practiced it! Because the strings are closer to the fretboard, hammer-ons are easier to execute on an electric guitar. However, this doesn't make them less common on an acoustic guitar, where they are used frequently to embellish open chords
The hammer-on can just as easily be played with fretted notes: just play the note normally and hammer onto another (higher-numbered) fret on the same string. If you practice hammer-ons, eventually you will be able to move each finger smoothly and independently.
The hammer-on can just as easily be played with fretted notes: just play the note normally and hammer onto another (higher-numbered) fret on the same string. If you practice hammer-ons, eventually you will be able to move each finger smoothly and independently.
Guitar- Hammer-ons, Pull-offs, and Trills
Hammer-ons and pull-offs are two closely related techiues. They are used to play legato, that is, in a smooth manner, and are also used to help the guitarist to play faster. They are most commonly used in electric guitar work, but can be used in acoustic tones as embellishments.
guitar- slides
The slide is one of the simplest guitar techniques. There are two kinds of slides: shift slides and legato slides. In a shift slide, a note is fretted, then the fretting finger slides up or down to a different fret, and the string is struck again. A legato slide differs in that the string is struck only for the first note.
Sweep picking
Sweep picking is a more specialized technique, occurring most often in metal. It involves playing a fast arpeggio with a special technique: when switching from one string to the next, mute the note currently ringing by lifting the fretting finger. A sweep can become a rake if notes are muted incorrectly. Rakes can sound nice, but they are not sweeps. Remember only 1 note can ring out at a time or it won't sound good. It takes practice and it helps to start slow and build up speed.
arpeggio
The word arpeggio (ar-peh-jee-oh) is Italian for, roughly, "like a harp", as it is a common technique for playing chords on the harp. To play an arpeggiated chord on the guitar, simply strum or pick the chord slowly, one string at a time, such that the ringing of each string is distinct. Arpeggios occur in all kinds of music, from classical to metal.
Guitar/Chord Types
A chord is three or more different notes played simultaneously. Chords derive their name from the root note. The interval relationship between the root note and the other notes determine whether it is a major, minor, augmented or diminished
chord. Chords may be strummed in entirety or the notes picked individually. Beginners find strumming much easier. The more advanced technique of picking is examined in the Picking and Plucking chapter. Power chords are intervals
because they consist of only two notes but they are usually treated as chords when described.
While chords are primarily used for rhythm guitar, basic chord knowledge is important for lead playing as well. The lead parts of many songs often require the use of chords, and in certain styles of playing, chords can make up the lead part
entirely. Additionally, many lead patterns revolve around arpeggios, which are chords with their notes played in sequence, rather than together. For more information on arpeggios, see the Arpeggio and Sweep Picking.
Chords are easy to play, but to understand why they sound how they do and why certain chords work better together than others, it is important to understand scales. While it is not necessary to have prior knowledge of scales to find this section useful, prior understanding of scales will definitely improve one's understanding of chords. It is recommended that before reading this section, one should familiarise themselves with general music theory first.
There are two main ways of playing chords, using open chords, which are the fundamental and often easiest chords for the guitar. Learning these chords is important, because it sets the stage for learning all other chords. Barre Chords are chords you make while pressing all (or most) of the strings down with your first finger. Barre chords are special, because they can be moved up and down the neck of the guitar, and the shape of the chord remains the same, although all the notes change. Barring is an important technique and greatly opens up the depth of the instrument.
Tapping
Tapping is a style of playing where notes are created by quickly pressing, or tapping, the string down on the fret that you want to play. Usually tapping involves both hands, and most often it is on an electric guitar. It is possible to tap on an
acoustic, but you cannot hear the notes as clearly as on an electric.
acoustic, but you cannot hear the notes as clearly as on an electric.
Scruggs style
Scruggs-style fingerpicking is played with thumb, first and second fingers; the fourth and/or third fingers are typically braced against the head of the instrument. The strings are picked rapidly in repetitive sequences or rolls; the same string is
not typically picked twice in succession. Melody notes are interspersed among arpeggios, and musical phrases typically contain long series of staccato notes, often played at very rapid tempos. The music is generally syncopated, and
may have a subtle swing or shuffle feel, especially on mid-tempo numbers. The result is lively, rapid music, which lends itself both as an accompaniment to other instruments and as a solo.
Rasgueado
The rasgueado or splinter striking technique originated from Spanish flamenco music, and usually refers to three or four fingers and sometimes the thumb striking the strings in quick succession. The notes quickly follow one another and
produce a "rattling" or cascading effect.
produce a "rattling" or cascading effect.
Travis Picking
Another well known style of finger picking is called Travis picking, named after Merle Travis who was a country singer known for his legendary picking skills. When picking, you use your thumb and first finger to hit notes at the same time,
creating a double stop or interval, and then continue picking with the first finger. Usually the thumb is responsible for picking the bass line, while the first/second finger is for melody. Skilled players can carry two separate melodies with the
upper and lower strings.
creating a double stop or interval, and then continue picking with the first finger. Usually the thumb is responsible for picking the bass line, while the first/second finger is for melody. Skilled players can carry two separate melodies with the
upper and lower strings.
Clawhammer and frailing
Clawhammer is sometimes known as frailing. It is primarily a down-picking style, and the hand assumes a claw-like shape and the strumming finger is kept fairly stiff, striking the strings by the motion of the hand at the wrist and elbow,
rather than a flicking motion by the finger. Typically, only the thumb and second or first finger are used and the finger always downpicks, flicking the string with the back of the fingernail.
A common characteristic of clawhammer patterns is the thumb does not pick on the downbeat, as one might in typical fingerpicking patterns for guitar. For example, this is a common, basic time signature
2/4 pattern:
1. Pick a melody note on the downbeat (quarter note)
2. On the second beat (music)
beat, strum a few strings with your strumming finger (roughly an eighth note)
3. Immediately following (on the second half of this beat), pick a note with the thumb, usually the shorter fifth string. (roughly an eighth note)
Here, the thumb plays the high drone on the second "and" of "one and two and". This combined with the second finger strumming provides a characteristic "bum-ditty bum-ditty" sound.
In frailing, the first fingertip is used for up-picking melody, and the second fingernail is used for rhythmic downward brushing.
In clawhammer, only downstrokes are used, and they are typically played with one fingernail as is the usual technique on the banjo.
Classical picking
In classical guitar repertoire, there will be a "PIMA" marking for the picking hand fingers (right hand for right handed players), which indicate which finger to use:
Pulgar, or thumb.
Indice, or index finger.
Medio, or middle finger.
Anular, or ring finger.
These four are the ones that are used most frequently. Sometimes, the fourth finger is used, in which it is marked either C, X or E.
Typically, the thumb has a down-picking motion and the fingers have an up-picking motion.
Fingerpicking
Fingerpicking is a method of playing the guitar where you use your thumb and at least one other finger to pick or pluck notes, using your fingernails, fingerpicks or fingertips. Talented players can use all five fingers on their picking hand, but
many players only use four fingers and use their pinky finger as a brace on the guitar. Most classical guitarists alter the shape of their picking hand fingernails for the purpose of producing a desired sound, however this is not necessary in
non-classical music; one can purchase fingerpicks to fit on the hand.
Generally fingerpicking involves picking through chords organized in a melody. Fingerpicking is used extensively in folk guitar and classical guitar, but it is also common in other genres.
Fingerpicking is surprisingly easy on an electric guitar, which is strange because fingerpicking is often regarded as an acoustic style. The player may hold his or her picking hand's fourth finger against the right edge (left edge on a
left-handed guitar), and if it is held straight and steady, this technique may be used to brace the hand. This technique is called anchoring, and is frowned upon by some players. It is possible on acoustic guitars by using the bridge similarly,
but this is not as effective as it will deaden the sound. Classical guitarists never anchor while playing.
When strumming with individual fingers, general rule is move the wrist only if the thumb is used, while if any other finger is used, only said finger will be used.
When you start trying to learn, your finger coordination will be terrible and it is easy to be discouraged. It takes several weeks to let your muscles develop, but if you practice using all your fingers at once your overall dexterity will increase
much faster.
Tirando Strikes
When performing a tirando, or shooting splinter strike, the finger does not affect the next string at all. this is the opposite of apoyando.
Apoyando Strikes
Apoyando, or splinter rested, involves the finger picking through a string such that the finger stops when resting on the next string. This technique produces a strong, loud tone, and is considered the opposite of Tirando.
Finger Strumming
Players wishing not to use a pick may try finger strumming. This is accomplished by holding the picking hand's first finger to the thumb, much as one might hold a pick, and striking the strings with the first fingernail. Anything in this book written for a pick can just as easily be played by finger strumming.
Using a pick
The primary advantages of the pick are its speed, its ease of striking large chords and, because the fingernails and fingertips are not involved, its preservation of player's picking hand. Furthermore, use of a pick makes a louder and brighter sound. Its primary disadvantage is its imprecision, making muting strings necessary. Also, if the player wishes to switch to the tapping style, he or she can tap with or with out the pick: to tap with the pick just put it on its side and tap it on the desired fret. However, tapping with a pick makes it harder to tap on multiple strings.
Tuesday, November 10, 2009
Using the Pentatonic Scale to Solo
Once you get comfortable using the pentatonic scale patterns, you'll want to try and start incorporating them into your solos, to allow you to solo in one key all over the fretboard of the guitar. Try sliding from note to note in the scale, or bending notes, to help find inspiration. Find a few riffs you like in positions you're not used to playing in, and incorporate those into your guitar solos.
How to use pentatonic scales
Once you've memorized the five positions of the pentatonic scale, you'll need to begin exploring how to use them in your music.
One of the best ways to start becoming comfortable with a new scale or pattern is to try and create a few interesting "riffs" with that scale. So, for example, try creating a few guitar riffs using the G minor pentatonic scale in the third position (beginning on the 8th fret). Strum a G minor chord, then play with the notes in the pattern until you find something you like. Try doing this for all five positions of the scale.
One of the best ways to start becoming comfortable with a new scale or pattern is to try and create a few interesting "riffs" with that scale. So, for example, try creating a few guitar riffs using the G minor pentatonic scale in the third position (beginning on the 8th fret). Strum a G minor chord, then play with the notes in the pattern until you find something you like. Try doing this for all five positions of the scale.
Monday, November 9, 2009
Right Hand Picking Position,
"First, when playing notes on the 1st few strings, lightly touch the palm of your right hand (near the thumb) on the lower strings (5th and 6th). You are NOT resting. There is a difference. You want to feel the strings on your palm, but do not anchor yourself and press down. The palm of your hand should float on the surface of the strings."
------PIC touching-hand, righ-hand-pos-side, righ-hand-pos-front
"Here are the reasons for using this hand position.
1. Being able to feel the strings on the palm of your hand will help you judge where the strings are more easily. If your hand is completely in the air, you would have a harder time finding and picking the correct string.
2. You are trying to develop a picking motion that comes from your wrist, not your fingers or arm. Touching the strings helps you in the development of this movement.
3. Noise reduction. Touching the strings lightly will reduce the amount of stray noise from the strings other than the one you are picking.
Obviously you can not touch the string when you are picking your 5th or 6th strings. But you can maintain the same hand position. One way to think about your hand position when you are picking your 5th and 6th string is this. Pretend that you are touching your right hand where the 7th and 8th strings would be if you had an 8 string guitar.
As you are picking, try to use as little motion as possible to get the job done. Don't let the tip of the pick drop too far below the surface of the strings. You can pick both down and up. The direction will depend on the rhythm and other factors.
When you are strums chords, your right hand will not touch the strings. You are going to keep your hand in the air and strum using your arm and wrist.
What are Pentatonic Scales?
The pentatonic scale is one of the most commonly used scales used in music. The pentatonic scale is used both for soloing, and for basing song riffs around. Guitarists with an interest in learning to play lead guitar must learn their pentatonic scales.
A pentatonic scale consists of just five notes. This differs from many "traditional" scales, which often have seven (or more) notes. The fewer number of notes in the pentatonic scale can be helpful to the beginner guitarist - the scale omits some of the "trouble" notes found in traditional major and minor scales that can end up sounding wrong if not used properly.
One of the beauties of the pentatonic scale on guitar is that the major and minor versions of the scale have the same shape, they're just played in different locations on the fretboard. This can be tricky to understand at first, but will become clear with practice

In order to learn the minor pentatonic scale patterns all over the guitar fretboard, we must first learn the scale on one string.
Start by picking a fret on the sixth string of your guitar - let's try the fifth fret (the note "A"). Play that note. This corresponds to the first note on the bottom left of the accompanying diagram. Then, slide your finger up three frets, and play that note. Then, move up two frets, and play that note. And, then move up two frets again, and play that note. Now move up three frets, and play that note. Finally, move up two frets, and play that note. This last note should be the octave of the first note you played. If you counted correctly, you should be at the 17th fret of your guitar. Once you've done this, try playing back down the fretboard, in reverse order, until you arrive back at the fifth fret. Keep doing this until you can play the scale pattern by memory.
you've just learned the A minor pentatonic scale. Strum an A minor chord... it should sound like it "fits" the scale you just played. Now, try playing the scale again, except this time, when you get to the 17th fret, try playing up the scale one note higher. Since the first and last notes of the pentatonic scale are the same note (an octave up), you can just begin repeating the pattern to play further up the string. So, in this case, the next note of the scale would be up three frets, or all the way up to the 20th fret. The note after that would be at the 22nd fret.
You can use this pattern to play the minor pentatonic scale anywhere on the guitar fretboard. If you started the scale pattern on the third fret of the sixth string, it would be the G minor pentatonic scale, since you started the pattern on the note G. If you started the scale on the third fret of the fifth string (the note "C"), you'd be playing the C minor pentatonic scale.

Start by playing the fifth fret of the sixth string (the note "A"). Play that note. Now, we're going to use the pattern we just learned for the minor pentatonic scale, except in this case, we'll start on the second note from the pattern. So, slide your finger up the string two frets to the seventh fret, and play that note.
Now, slide up two frets, and play that note. Slide up three frets, and play that note. Then, slide up two frets, and play that note (you'll note that we're now at the end of the diagram above). Slide up three final frets, and play that note. You should be at the 17th fret (the note "A"). Now, play the scale back down the fretboard, until you arrive again at the fifth fret. You've just played an A major pentatonic scale. Strum an A major chord - it should sound like it "fits" with the scale you just played.
You should spend time playing both the major and minor pentatonic scales. Try strumming an A minor chord, then playing the A minor pentatonic scale up the sixth string. Then, play an A major chord, and follow it with the A major pentatonic scale.

To play the minor pentatonic scale, start with your first finger on the fifth fret of the sixth string. Play that note, then put your fourth (pinky) finger on the eighth fret of the sixth string, and play that. Continue to play the scale, being sure to play all notes on the seventh fret with your third finger, and notes on the eighth fret with your fourth finger. When you've finished playing the scale forwards, play it in reverse.
You've just played an A minor pentatonic scale. The scale we played was an A minor pentatonic scale because the first note we played (sixth string, fifth fret) was the note A.
Now, let's use the exact same scale pattern to play an A major pentatonic scale, which has a totally different sound. To use this pattern as a major pentatonic scale, the root of the scale is played by your fourth finger on the sixth string.
So, to play the A major pentatonic scale, position your hands so that your fourth finger will play the note "A" on the sixth string (which means your first finger will be at the second fret of the sixth string). Play the scale pattern forwards and backwards. You're now playing an A major pentatonic scale. Strum an A major chord - it should sound like it "fits" with the scale you just played.

We're going to play the A minor pentatonic scale in the second position. Start by playing the "A" on the fifth fret of the sixth string. Now, slide up three frets on the sixth string, to the second note of the scale (the eighth fret, in this case). The pentatonic scale pattern appearing on this page begins here.
Play the first note of this pattern with your second finger. Continue playing the pentatonic scale pattern as outlined in the diagram. When you've reached the top of the scale, play it backwards. Be sure to follow the fingering outlined above, and to memorize the scale as you play it.
You've just played an A minor pentatonic scale, in second position. Getting comfortable with playing this scale can be tricky - although it's an A minor pentatonic scale, the pattern starts on the note "C", which can be disorienting at first. If you're having trouble, try playing the root note, sliding up on the sixth string to the second note, and playing the second position pattern.
To use this pattern as a minor pentatonic scale, the root of the scale is played by your first finger on the fourth string. To use this pattern as a major pentatonic scale, the root of the scale is played by your second finger on the sixth string.

Begin the pattern with your second finger on the sixth string. This is the only pentatonic scale pattern that requires a "position shift" - when you reach the second string, you'll need to shift your hand up one fret. When you play back down the scale, you'll need to change position again, when you reach the third string. Play the scale forwards and backwards, until you've memorized it.
To use this pattern as a minor pentatonic scale, the root of the scale is played by your fourth finger on the fifth string. To use this pattern as a major pentatonic scale, the root of the scale is played by your second finger on the fourth string.

Play this scale slowly and evenly, backwards and forwards, until you've memorized the pattern. Strum an A minor chord, then play this fourth position of the A minor pentatonic scale... the two should sound like they "fit".
To use this pattern as a minor pentatonic scale, the root of the scale is played by your first finger on the fifth string. To use this pattern as a major pentatonic scale, the root of the scale is played by your fourth finger on the fifth string.

then up two frets to the fourth note of the scale, then up three frets to the 15th fret, where we'll begin to play the above pattern.
Play this scale slowly and evenly, starting with your second finger, backwards and forwards, until you've memorized the pattern.
To use this pattern as a minor pentatonic scale, the root of the scale is played by your fourth finger on the sixth string. To use this pattern as a major pentatonic scale, the root of the scale is played by your second finger on the fifth string.
A pentatonic scale consists of just five notes. This differs from many "traditional" scales, which often have seven (or more) notes. The fewer number of notes in the pentatonic scale can be helpful to the beginner guitarist - the scale omits some of the "trouble" notes found in traditional major and minor scales that can end up sounding wrong if not used properly.
One of the beauties of the pentatonic scale on guitar is that the major and minor versions of the scale have the same shape, they're just played in different locations on the fretboard. This can be tricky to understand at first, but will become clear with practice

Start by picking a fret on the sixth string of your guitar - let's try the fifth fret (the note "A"). Play that note. This corresponds to the first note on the bottom left of the accompanying diagram. Then, slide your finger up three frets, and play that note. Then, move up two frets, and play that note. And, then move up two frets again, and play that note. Now move up three frets, and play that note. Finally, move up two frets, and play that note. This last note should be the octave of the first note you played. If you counted correctly, you should be at the 17th fret of your guitar. Once you've done this, try playing back down the fretboard, in reverse order, until you arrive back at the fifth fret. Keep doing this until you can play the scale pattern by memory.
you've just learned the A minor pentatonic scale. Strum an A minor chord... it should sound like it "fits" the scale you just played. Now, try playing the scale again, except this time, when you get to the 17th fret, try playing up the scale one note higher. Since the first and last notes of the pentatonic scale are the same note (an octave up), you can just begin repeating the pattern to play further up the string. So, in this case, the next note of the scale would be up three frets, or all the way up to the 20th fret. The note after that would be at the 22nd fret.
You can use this pattern to play the minor pentatonic scale anywhere on the guitar fretboard. If you started the scale pattern on the third fret of the sixth string, it would be the G minor pentatonic scale, since you started the pattern on the note G. If you started the scale on the third fret of the fifth string (the note "C"), you'd be playing the C minor pentatonic scale.

Learning the major pentatonic scale is easy once you've learned the minor pentatonic scale - the two scales share all the same notes! The major pentatonic scale uses the exact same pattern as the minor pentatonic scale, it simply starts on the second note of the pattern.
Start by playing the fifth fret of the sixth string (the note "A"). Play that note. Now, we're going to use the pattern we just learned for the minor pentatonic scale, except in this case, we'll start on the second note from the pattern. So, slide your finger up the string two frets to the seventh fret, and play that note.
Now, slide up two frets, and play that note. Slide up three frets, and play that note. Then, slide up two frets, and play that note (you'll note that we're now at the end of the diagram above). Slide up three final frets, and play that note. You should be at the 17th fret (the note "A"). Now, play the scale back down the fretboard, until you arrive again at the fifth fret. You've just played an A major pentatonic scale. Strum an A major chord - it should sound like it "fits" with the scale you just played.
You should spend time playing both the major and minor pentatonic scales. Try strumming an A minor chord, then playing the A minor pentatonic scale up the sixth string. Then, play an A major chord, and follow it with the A major pentatonic scale.

The first position of the pentatonic scale is one that may look familiar to some of you - it looks very similar to a blues scale.
To play the minor pentatonic scale, start with your first finger on the fifth fret of the sixth string. Play that note, then put your fourth (pinky) finger on the eighth fret of the sixth string, and play that. Continue to play the scale, being sure to play all notes on the seventh fret with your third finger, and notes on the eighth fret with your fourth finger. When you've finished playing the scale forwards, play it in reverse.
You've just played an A minor pentatonic scale. The scale we played was an A minor pentatonic scale because the first note we played (sixth string, fifth fret) was the note A.
Now, let's use the exact same scale pattern to play an A major pentatonic scale, which has a totally different sound. To use this pattern as a major pentatonic scale, the root of the scale is played by your fourth finger on the sixth string.
So, to play the A major pentatonic scale, position your hands so that your fourth finger will play the note "A" on the sixth string (which means your first finger will be at the second fret of the sixth string). Play the scale pattern forwards and backwards. You're now playing an A major pentatonic scale. Strum an A major chord - it should sound like it "fits" with the scale you just played.

Here is why it was important to learn the pentatonic scale on one string. We're going to learn how to play the pentatonic scale in the "second position" - which means the first note in the position is the second note in the scale.
We're going to play the A minor pentatonic scale in the second position. Start by playing the "A" on the fifth fret of the sixth string. Now, slide up three frets on the sixth string, to the second note of the scale (the eighth fret, in this case). The pentatonic scale pattern appearing on this page begins here.
Play the first note of this pattern with your second finger. Continue playing the pentatonic scale pattern as outlined in the diagram. When you've reached the top of the scale, play it backwards. Be sure to follow the fingering outlined above, and to memorize the scale as you play it.
You've just played an A minor pentatonic scale, in second position. Getting comfortable with playing this scale can be tricky - although it's an A minor pentatonic scale, the pattern starts on the note "C", which can be disorienting at first. If you're having trouble, try playing the root note, sliding up on the sixth string to the second note, and playing the second position pattern.
To use this pattern as a minor pentatonic scale, the root of the scale is played by your first finger on the fourth string. To use this pattern as a major pentatonic scale, the root of the scale is played by your second finger on the sixth string.

In order to play the third position of the minor pentatonic scale, count up to the third note of the scale on the sixth string. To play an A minor pentatonic scale in the third position, start at "A" on the fifth fret, then up three frets to the second note of the scale, then up two frets to the 10th fret, where we'll begin to play the above pattern.
Begin the pattern with your second finger on the sixth string. This is the only pentatonic scale pattern that requires a "position shift" - when you reach the second string, you'll need to shift your hand up one fret. When you play back down the scale, you'll need to change position again, when you reach the third string. Play the scale forwards and backwards, until you've memorized it.
To use this pattern as a minor pentatonic scale, the root of the scale is played by your fourth finger on the fifth string. To use this pattern as a major pentatonic scale, the root of the scale is played by your second finger on the fourth string.

In order to play the fourth position of the minor pentatonic scale, count up to the fourth note of the scale on the sixth string. To play an A minor pentatonic scale in the fourth position, start at "A" on the fifth fret, then count up three frets to the second note of the scale, then up two frets to the third note of the scale, then up two frets to the 12th fret, where we'll begin to play the above pattern.
Play this scale slowly and evenly, backwards and forwards, until you've memorized the pattern. Strum an A minor chord, then play this fourth position of the A minor pentatonic scale... the two should sound like they "fit".
To use this pattern as a minor pentatonic scale, the root of the scale is played by your first finger on the fifth string. To use this pattern as a major pentatonic scale, the root of the scale is played by your fourth finger on the fifth string.

In order to play the fifth position of the minor pentatonic scale, count up to the fifth note of the scale on the sixth string. To play an A minor pentatonic scale in the fifth position, start at "A" on the fifth fret, then count up three frets to the second note of the scale, then up two frets to the third note of the scale,
then up two frets to the fourth note of the scale, then up three frets to the 15th fret, where we'll begin to play the above pattern.
Play this scale slowly and evenly, starting with your second finger, backwards and forwards, until you've memorized the pattern.
To use this pattern as a minor pentatonic scale, the root of the scale is played by your fourth finger on the sixth string. To use this pattern as a major pentatonic scale, the root of the scale is played by your second finger on the fifth string.
Saturday, November 7, 2009
How to use Pick
If you watch 10 different guitar players, you are going to see 10 different ways that
they approach picking. If you take 10 different guitar lessons from 10 different
teachers, you are going to learn that the "correct" way to pick can very greatly. With
that said, I am going to write about what I feel is the best way to approach your right
hand picking technique. Just remember that the 9 other teachers/players may
disagree.
Choosing a guitar pick
First, what kind of pick should you use? This is really a matter of personal taste.
After you have been playing for a little while, I would start experimenting with
different shapes and gauges. But if you are just starting out, I would use a standard
size, and a medium thickness. You may want to look for a brand of pick that has a
little bit of a texture to it. If a pick is glossy and completely smooth, you may have
trouble hanging on to it. Especially if your hand sweats. The pick will just slide
around between your fingers. Another option is to take a piece of fine sand paper,
and "rough up" your picks a little. This will give you a little more grip on the pick.
Here are some other things that you might look for in a pick. Look for smooth edges.
Sometimes poorly made picks have a rough edge. You can see excess plastic or
nylon hanging off of it. This will just cause your picking to have a rougher sound.
Make sure the pick is flat. You will find that some picks are warped, so give them
the once over to make sure that they are flat.
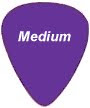
Standard size - Medium gauge


they approach picking. If you take 10 different guitar lessons from 10 different
teachers, you are going to learn that the "correct" way to pick can very greatly. With
that said, I am going to write about what I feel is the best way to approach your right
hand picking technique. Just remember that the 9 other teachers/players may
disagree.
Choosing a guitar pick
First, what kind of pick should you use? This is really a matter of personal taste.
After you have been playing for a little while, I would start experimenting with
different shapes and gauges. But if you are just starting out, I would use a standard
size, and a medium thickness. You may want to look for a brand of pick that has a
little bit of a texture to it. If a pick is glossy and completely smooth, you may have
trouble hanging on to it. Especially if your hand sweats. The pick will just slide
around between your fingers. Another option is to take a piece of fine sand paper,
and "rough up" your picks a little. This will give you a little more grip on the pick.
Here are some other things that you might look for in a pick. Look for smooth edges.
Sometimes poorly made picks have a rough edge. You can see excess plastic or
nylon hanging off of it. This will just cause your picking to have a rougher sound.
Make sure the pick is flat. You will find that some picks are warped, so give them
the once over to make sure that they are flat.
Standard size - Medium gauge


Friday, November 6, 2009
Thaat
Hindustani heptatonic theory additionally stipulates that the second, third, sixth and
seventh degrees of heptatonic scale forms (septak) are also allowed only two
inflections each, in this case, one natural position, and one lowered (komal) position.
Arithmetically this produces 25, or thirty-two, possibilities, but Hindustani theory, in
contradistinction to Carnatic theory, excludes scale forms not commonly used.
Heptonia Tertia
The last group of seven note tone/semitone scales are known as Heptonia Tertia and
consist of scales with two adjacent semitones which amounts to a whole-tone scale
but with an additional note somewhere in its sequence e.g. b c d e f# g# a#.
consist of scales with two adjacent semitones which amounts to a whole-tone scale
but with an additional note somewhere in its sequence e.g. b c d e f# g# a#.
Heptonia Prima and Secunda
Heptonia Prima and Secunda
The rather unwieldy name of Heptonia Prima and Heptonia Secunda are given to the
various seven-note scales which can be formed using tones and semitones but
without two semi-tones appearing in succession. Some are more theoretical than
others. They are
Heptonia Prima
Beginning on keynote A and working up the notes of the 'natural minor' scale
(A,B,C,D,E,F,G,A), the seven modes are:
Aeolian mode (natural minor)
Locrian mode
Ionian Mode (major)
Dorian Mode
Phrygian Mode
Lydian Mode
Mixolydian Mode
It may be noted that the Dorian is exactly the same descending as ascending. The
less common series is
Heptonia Secunda
The difference between this and the diatonic modes is that they have two and three
tones between each semitone, while these latter modes have one and four. These
are sometimes called modes of the melodic ascending minor since that is the most
commonly used scale of this type, but other modes can be produced by starting on
the different scale notes in turn. Thus starting on keynote A as above and following
the notes of the ascending melodic minor (A,B,C,D,E,F#,G#) yields these seven
modes:
'Melodic ascending minor'
'Phrygian raised sixth' combines the Phrygian flat second and Dorian raised sixth
'Lydian raised fifth' combines the Lydian fourth with a raised fifth
'Acoustic' or 'Lydian-Myxolydian' Scale So-called because close to the scale built
on natural overtones and combines Lydian raised fourth with Myxolydian flat
seventh
'Major minor' scale Like natural minor (aeolian) but with a major third
'Half diminished' or 'Locrian sharp 2' scale This is like the Locrian with a raised
second
'Altered scale' Like Locrian with flat fourth
These modes are more awkward to use than those of the diatonic scales due to the
four tones in a row yielding augmented intervals on one hand while the one tone
between two semitones gives rise to diminished intervals on the other. For example,
the last two modes listed above both have 'Locrian' diminished triads built on their
tonics given them unstable tonality while the fourth mode not only has an augmented
fourth a la the Lydian mode but also an augmented fifth making the dominant and
subdominant unusable.
Harmonic minor scale
The harmonic minor scale is so called because in tonal music of the “common
practice period” (from approximately 1600 to approximately 1900) chords or
harmonies are more commonly derived from it than from either the natural minor
scale or the melodic minor scale. The augmented second between its sixth degree
and its raised (“leading tone”) seventh degree, usually traditionally considered
undesirable, is easily avoided by distributing these pitches among voices. In the
chord progression, D F A(flat), B F G, C E(flat) G, (ii0, V7, i in C minor) for example,
the Ab in the upper voice never ascends to B, and the B in the lower voice never
descends to Ab.
Melodic minor scale
In traditional classical theory the melodic minor scale has two forms, as noted
above, an ascending form and a descending form. Although each of these forms of
itself comprises seven pitches, together they comprise nine, which might seem to
call into question the scale’s status as a heptatonic scale. In certain twentieth-century
music, however, it became common systematically to use the ascending form for
both ascending and descending passages. Such a use has been notably ascribed to
the works of Bela Bartok and to bop and post-bop jazz practice. The traditional
descending form of the melodic minor scale is equivalent to the natural minor scale in
both pitch collection (which is diatonic) and tonal center.
Diatonic scale
The term diatonic scale refers to a pitch collection and does not imply any particular
tonal center or note of especial emphasis. It is in this respect different from the term
major scale, which does imply a tonal center.
tonal center or note of especial emphasis. It is in this respect different from the term
major scale, which does imply a tonal center.
Heptatonic scale
A heptatonic scale is a musical scale with seven pitches per octave. Among the
most famous of these are the diatonic scale, C D E F G A B C; the melodic minor
scale, C D E(flat) F G A B C ascending, C B(flat) A(flat) G F E(flat) D C descending;
the harmonic minor scale, C D E(flat) F G A(flat) B C; and a scale variously known
as the Byzantine, Hungarian, gypsy, or Egyptian scale, C D E(flat) F(sharp) G A(flat)
B C. South Indian (Carnatic music) classical theory postulates seventy-two
melakarta, seven-tone scale types, whereas Hindustani classical music postulates
twelve or ten (depending on the theorist) seven-tone scale types collectively called
thaat.
Tritone scale
The tritone scale, C D(flat) E G(flat) G(natural) B(flat) is enharmonically equivalent to
the Petrushka chord, C C(sharp) E F(sharp) G A(sharp).
The two-semitone tritone scale, C D(flat) D F(sharp) G A(flat), is a symmetric scale
consisting of a repeated pattern of two semitones followed by a major third now used
for improvisation and may substitute for any mode of the jazz minor scale. The scale
originated in Nicolas Slonimsky's book Thesaurus of Scales and Melodic Patterns
through the, "equal division of one octave into two parts," creating a tritone, and the,
"interpolation of two notes," adding two consequent semitones after the two resulting
notes.
Blues scale
Since blue notes are alternate inflections, strictly speaking there can be no one blues
scale[2], but the scale most commonly called "the blues scale" comprises a flatted
seventh blue note, a flatted third blue note, and a flatted fifth blue note along with other
pitches derived from the minor pentatonic scale: C E(flat) F F(sharp) G B(flat) C.
scale[2], but the scale most commonly called "the blues scale" comprises a flatted
seventh blue note, a flatted third blue note, and a flatted fifth blue note along with other
pitches derived from the minor pentatonic scale: C E(flat) F F(sharp) G B(flat) C.
Prometheus scale
The Prometheus scale is so called because of its prominent use in Alexander
Scriabin's symphonic poem Prometheus: The Poem of Fire. Scriabin himself called
this set of pitches, voiced as the simultaneity (in ascending order) C F(sharp) B(flat)
E A D the "mystic chord". Others have referred to it as the "Promethean chord".
Scriabin's symphonic poem Prometheus: The Poem of Fire. Scriabin himself called
this set of pitches, voiced as the simultaneity (in ascending order) C F(sharp) B(flat)
E A D the "mystic chord". Others have referred to it as the "Promethean chord".
Synthetic modes#Hexatonic scales
The augmented scale, also known in jazz theory as the symmetrical augmented
scale, is so called because it can be thought of as an interlocking combination of two
augmented triads a minor second or minor third apart: C E G(sharp) and E(flat) G B.
It may also be called the "minor-third half-step scale" due to the series of intervals
produced
scale, is so called because it can be thought of as an interlocking combination of two
augmented triads a minor second or minor third apart: C E G(sharp) and E(flat) G B.
It may also be called the "minor-third half-step scale" due to the series of intervals
produced
Whole tone scale
The whole tone scale is a series of whole tones. It has two non-enharmonically
equivalent positions: C D E F(sharp) G(sharp) A(sharp) C and D(flat) E(flat) F G A B
D(flat).
equivalent positions: C D E F(sharp) G(sharp) A(sharp) C and D(flat) E(flat) F G A B
D(flat).
hexatonic scale
in music and music theory, a hexatonic scale is a scale with six pitches or notes
per octave. Famous examples include the whole tone scale, C D E F(sharp)
G(sharp) A(sharp) C; the augmented scale, C D(sharp) E G A(flat) B C; the
Prometheus scale, C D E F(sharp) A B(flat) C; and what some jazz theorists call the
"blues scale", C E(flat) F F(sharp) G B(flat) C
per octave. Famous examples include the whole tone scale, C D E F(sharp)
G(sharp) A(sharp) C; the augmented scale, C D(sharp) E G A(flat) B C; the
Prometheus scale, C D E F(sharp) A B(flat) C; and what some jazz theorists call the
"blues scale", C E(flat) F F(sharp) G B(flat) C
Triads
As mentioned above in the context of Stravinsky's Petrushka chord, both the C
major and F# major triads are obtainable from a single permutation of the diminished
scale. In fact eight major and minor triads can be obtained from each permutation of
the scale. If one takes the Db diminished scale as outlined above, one can produce
the following triads:
C major (C E G)
C minor (C Eb G)
Eb major (Eb G Bb)
Eb minor (Eb Gb Bb)
F# major (F# A# C#)
F# minor (F# A C#)
A major (A C# E)
A minor (A C E)
Petrushka chord
Igor Stravinsky's ballet Petrushka is characterized by the so-called Petrushka
chord',' which combines major triads transpositionally related by a tritone. Taruskin's
ascription of explanatory power to the chord's status as an octatonic subset has
been challenged by Tymoczko
chord',' which combines major triads transpositionally related by a tritone. Taruskin's
ascription of explanatory power to the chord's status as an octatonic subset has
been challenged by Tymoczko
Jazz
Both the half-whole diminished and its partner mode, the whole-half diminished (with
a tone rather than a semitone beginning the pattern) are commonly used in jazz
improvisation, frequently under different names. The whole-half diminished scale is
commonly used in conjunction with diminished harmony (e.g., the "C dim7" chord)
while the half-whole scale is used in dominant harmony (e.g., with a "G7b9" chord).
Octatonic scale
An octatonic scale is any eight-note musical scale. Among the most famous of these
is a scale in which the notes ascend in alternating intervals of a whole step and a
half step, creating a symmetric scale. In classical theory, in contradistinction to jazz
theory, this scale is commonly simply called the octatonic scale, although there are
forty-two other non-enharmonically equivalent, non-transpositionally equivalent
eight-tone sets possible. In jazz theory this scale is more particularly called the
diminished scale (Campbell 2001, p. 126), or symmetric diminished scale (Hatfield
2005, p. 125), because it can be conceived as a combination of two interlocking
diminished seventh chords, just as the augmented scale can be conceived as a
combination of two interlocking augmented triads. The earliest systematic treatment
of the octatonic scale was Edmond de Polignac's unpublished treatise, "Etude sur les
successions alternantes de tons et demi-tons (Et sur la gamme dite
majeure-mineure)" from c. 1879 (Kahan 2009), which preceded Vito Frazzi's Scale
alternate per pianoforte of 1930 by a full half-century (Sanguinetti 1993). The term
octatonic pitch collection was first introduced into English by Arthur Berger in 1963
(Van den Toorn 1983).
The twelve tones of the chromatic scale partition into three non-overlapping
diminished seventh chords. A combination of any two, omitting the third, forms an
octatonic collection. As there are three diminished-seventh chords that can be
omitted, it follows that there are only three distinct (non-transpositionally equivalent)
diminished scales in the 12-tone system. Thus Olivier Messiaen considered it one of
the modes of limited transposition. A given diminished scale has only two modes
(one beginning its ascent with a whole step between its first two notes, while the
other begins its ascent with a half step or semitone). T.
Each of the three distinct scales can form differently named scales with the same
sequence of tones by starting at a different point in the scale. With alternative starting
points listed in parentheses, the three are:
Eb diminished (Fb/Gb, A, C diminished): Eb, F, F#, G#, A, B, C, D, Eb
D diminished (F, Ab, B diminished): D, E, F, G, Ab, Bb, B, C#, D
Db diminished (E, G, Bb diminished): Db, Eb, E, F#, G, A, Bb, C, Db
Among the collection's remarkable features is that it is the only collection that can be
disassembled into four transpositionally-related pitch pairs in six different ways, each
of which features a different interval class (Cohn). For example:
semitone: (C, C#), (D#, E) (F#, G), (A, Bb)
whole step: (C#,D#), (E, F#), (G, A), (Bb, C)
minor third:(C, Eb), (F#, A), (C#, E), (G, Bb)
major third:(C, E), (F#, Bb), (Eb, G), (A, C#)
perfect fourth: (C#, F#), (Bb,Eb), (G,C), (E,A)
tritone: (C, F#), (Eb,A), (C#,G), (E, Bb)
Octatonic scales first occurred in Western music as byproducts of a series of
minor-third transpositions. Agmon locates one in the music of Scarlatti, from the
1730s. Langle's 1797 harmony treatise contains a sequential progression with a
descending octatonic bass, supporting harmonies that use all and only the notes of
an octatonic scale (p. 72, ex. 25.2). The question of when Western composers first
began to select octatonic scales as primary compositional material is difficult to
determine. One strong candidate is a recurring theme in Franz Liszt's Feux Follets,
the fifth of his first book of Etudes d'exécution transcendente (composed 1826, and
twice revised). See descending arpeggiated figures of bars 7 and 8, 10 and 11, 43,
45 through 48, 122, and 124 through 126. In turn, all three distinct octatonic scales
are used, respectively containing all, and only, the notes of each of these scales.
Jazz, Petrushka chord, Triads
Scalar transposition
Composers often transform musical patterns by moving every note in the pattern by a constant number of scale steps: thus, in the C major scale, the pattern C-D-E might be shifted up, or transposed, a single scale step to become D-E-F. This process is called "scalar transposition" and can often be found in musical sequences. Since the steps of a scale can have various sizes, this process introduces subtle melodic and harmonic variation into the music. This variation is what gives scalar music much of its complexity.
SCALES
In music, a scale is a group of musical notes collected in ascending and descending order, that provides material for or is used to conveniently represent part or all of a musical work including melody and/or harmony. Scales are ordered in pitch or pitch class, with their ordering providing a measure of musical distance.
Scales are typically listed from low to high. Most scales are octave-repeating, meaning their pattern of notes is the same in every octave. An octave-repeating scale can be represented as a circular arrangement of pitch classes, ordered by increasing (or decreasing) pitch class. For instance, the increasing C major scale is, C-D-E-F-G-A-B-[C], with the bracket indicating that the last note is an octave higher than the first note. Or C-B-A-G-F-E-D-[C], with the bracket indicating an octave lower than the first note in the scale.
Scales are typically listed from low to high. Most scales are octave-repeating, meaning their pattern of notes is the same in every octave. An octave-repeating scale can be represented as a circular arrangement of pitch classes, ordered by increasing (or decreasing) pitch class. For instance, the increasing C major scale is, C-D-E-F-G-A-B-[C], with the bracket indicating that the last note is an octave higher than the first note. Or C-B-A-G-F-E-D-[C], with the bracket indicating an octave lower than the first note in the scale.
pentatonic scale
A pentatonic scale is a musical scale with five pitches per octave in contrast to a heptatonic (seven note) scale such as the major scale. Pentatonic scales are very common and are found all over the world, including Celtic folk music, Hungarian folk music, West African music, African-American spirituals, Jazz, American blues music and rock music, Sami joik singing, children's songs, the Greek traditional music and songs from Epirus, Northwest Greece and the music of Southern Albania, the tuning of the Ethiopian krar and the Indonesian gamelan, Philippine Kulintang, melodies of Korea, Japan, China, India and Vietnam (including the folk music of these countries), the Afro-Caribbean tradition, Polish highlanders from the Tatra Mountains, and Western Classical composers such as French composer Claude Debussy.The pentatonic scale is also used on the Great Highland Bagpipe.
The common pentatonic major and minor scales (C-D-E-G-A and C-Eb-F-G-Bb,
respectively) are useful in modal composing, as both scales allow a melody to be
modally ambiguous between their respective major (Ionian, Lydian, Mixolydian) and
minor (Aeolian, Phrygian, Dorian) modes (Locrian excluded). With either modal or
non-modal writing, however, the harmonization of a pentatonic melody does not
necessarily have to be derived from only the pentatonic pitches.
Jazz harmony
The scale is also used extensively in modern jazz writing and jazz harmony. Wayne Shorter's composition "JuJu" features heavy use of the whole tone scale, and John Coltrane's One Down, One Up is built off two augmented chords arranged in the same simple structure as his earlier tune Impressions. However, these are only the most overt examples of the use of this scale in jazz. A vast number of jazz tunes, including many standards, use augmented chords and their corresponding scales as well, usually to create tension in turnarounds or as a substitute for a dominant seventh chord. Art Tatum and Thelonious Monk are two pianists who used the whole tone scale extensively and creatively.
Subscribe to:
Posts (Atom)